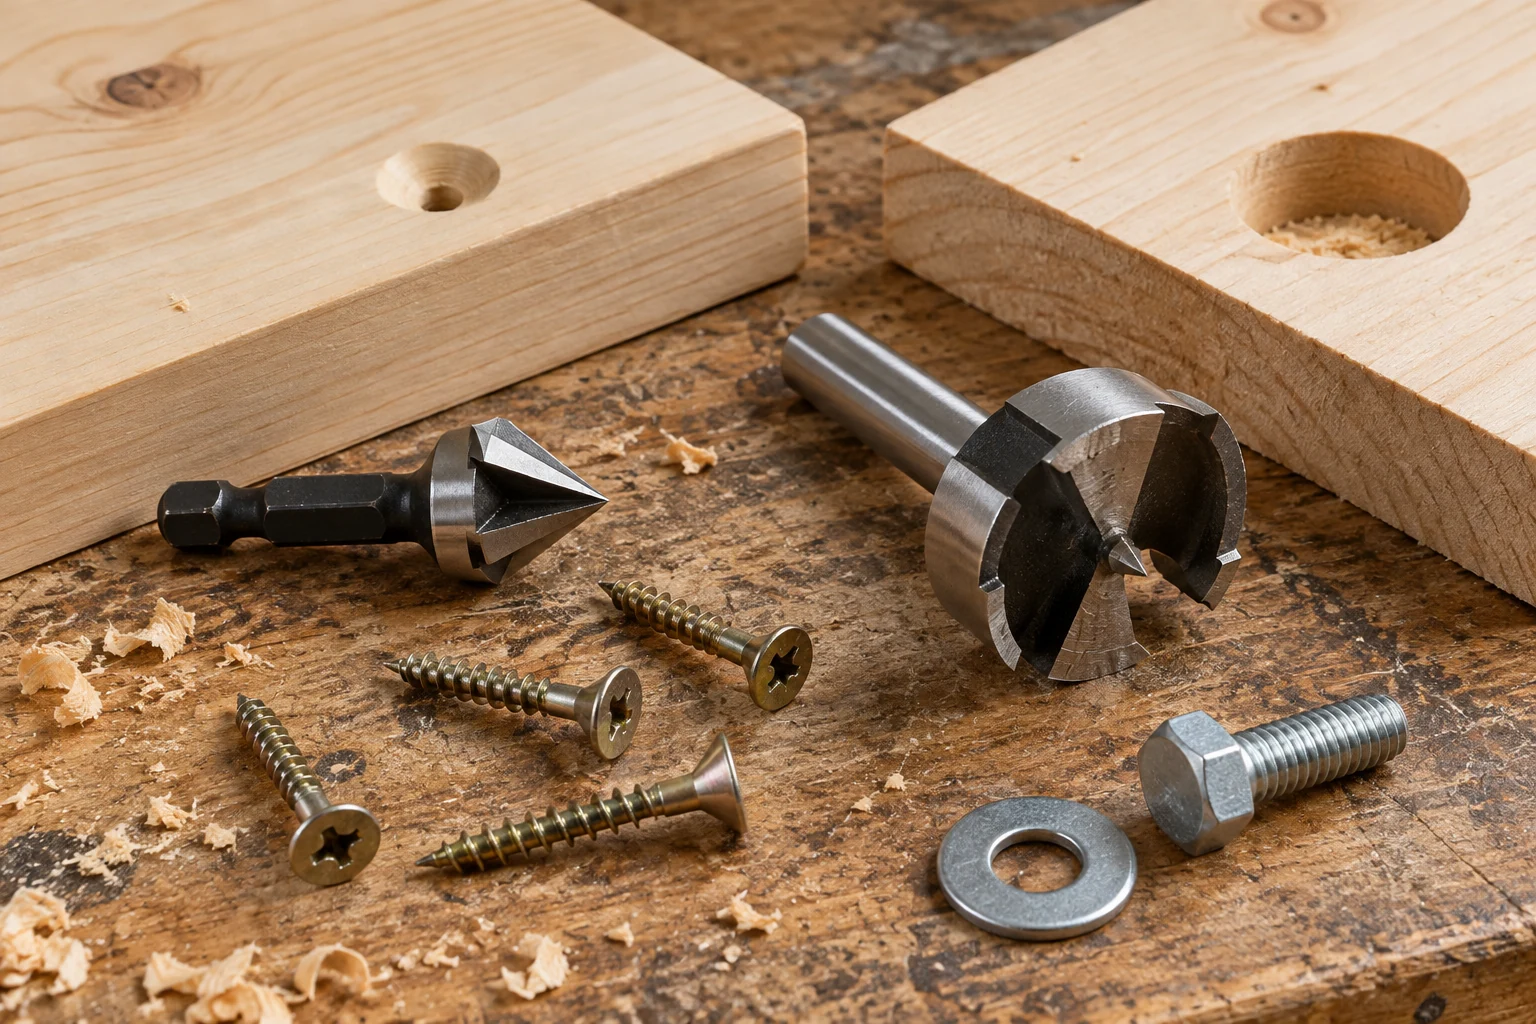
Use a countersink for a matching conical screw head and a counterbore for a suitable flat-underhead fastener or washer that needs to sit below the surface
Match the recess to the underside of the head, then check its diameter, depth and tool access
Countersink and counterbore shapes compared
| Feature | Countersink | Counterbore |
|---|---|---|
| Shape | Conical seating surface | Cylindrical recess with a flat seat |
| Typical fastener | Matching countersunk screw | Suitable flat-underhead screw, bolt or washer |
| Critical dimensions | Included angle and diameter | Diameter and depth |
| Common mistake | Using driving force to crush the head into a mismatched seat | Leaving too little timber beneath the recess or no room for the driver |
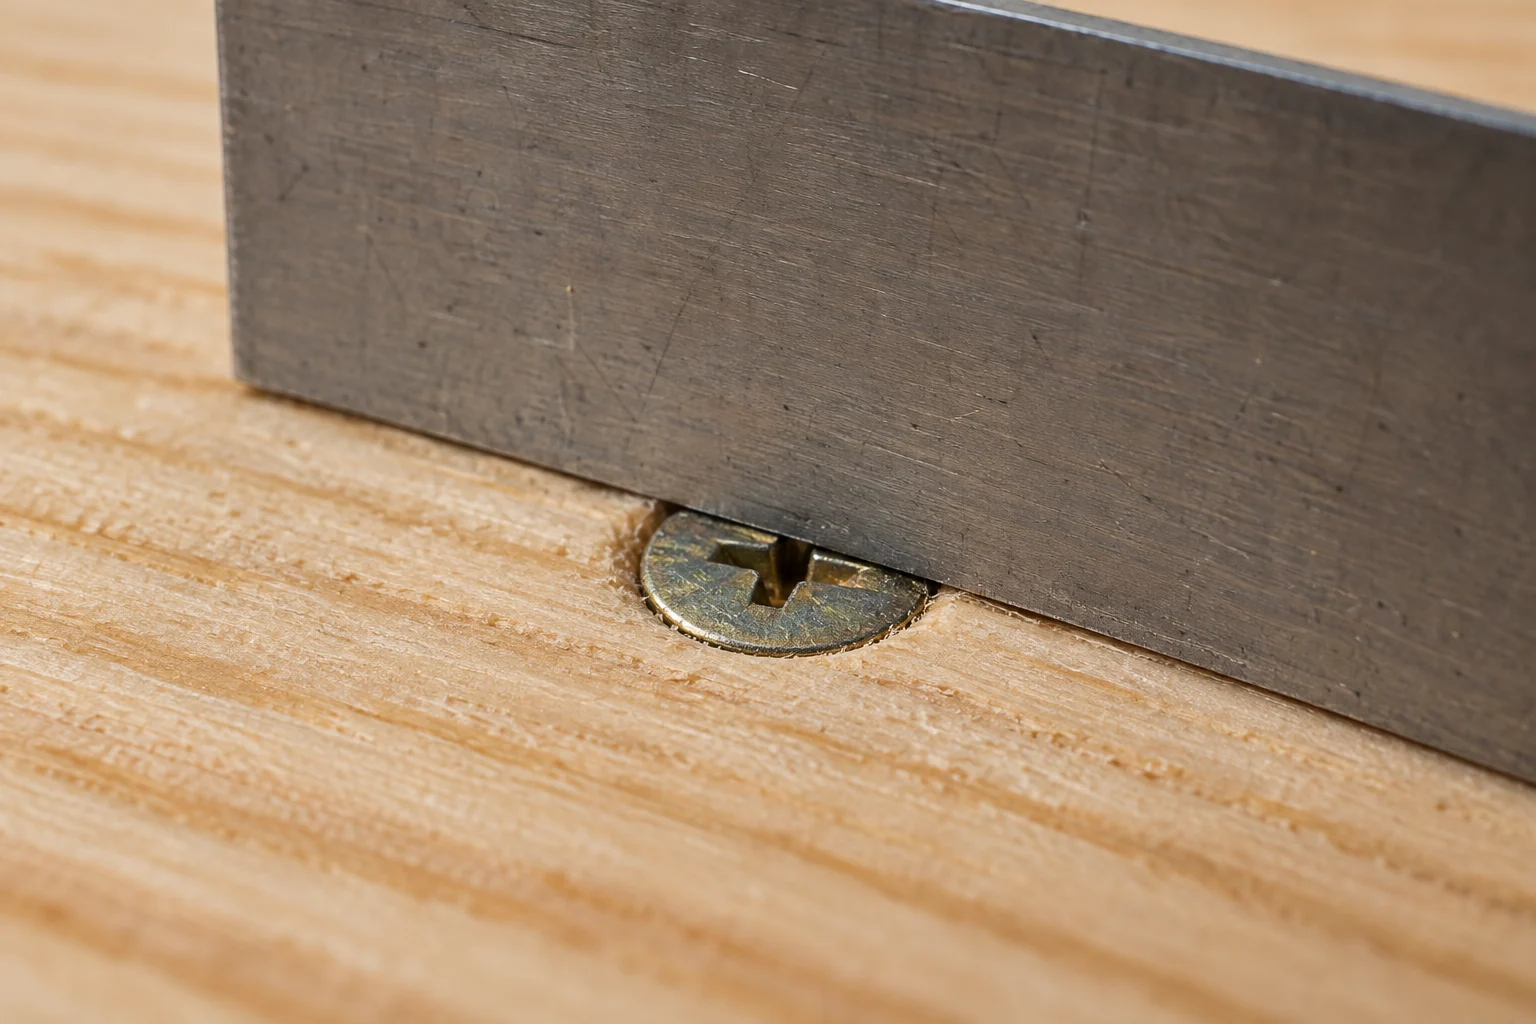
A flat-looking screw top does not establish the seating shape; inspect its underside, as shown in Rockler’s comparison
Pilot hole vs clearance hole vs head recess
| Hole | Purpose |
|---|---|
| Pilot | Prepares the wood in which the threads will engage |
| Clearance | Allows the relevant fastener section to pass through the nearer piece |
| Countersink or counterbore | Accommodates the head or hardware assembly |
A combined bit can form more than one feature, but each feature still needs the correct dimensions for the joint
For a two-piece connection, identify where the threads engage and where the head bears; proprietary structural screws may have installation requirements that differ from a general furniture joint
Match the bit to the head, washer and driver
- Inspect the actual fastener
Check the head shape, any specified countersink angle and the driver
- Include the washer
Size the recess for everything that must sit inside it
- Allow tool access
Check that the bit or socket reaches and turns
- Allow for a plug if required
Provide the specified space above the fastener and test the plug fit
- Check the timber
Locate the hole clear of conflicting fixings and follow the plan’s thickness and edge-distance requirements
Worked example: choosing a counterbore for measured hardware
Assume your actual hardware has a flat-bottom head 4 mm tall, a washer 1.5 mm thick and 18 mm across, and a driver or socket 16 mm across
| Check | Example result |
|---|---|
| Largest diameter that must enter | 18 mm washer, rather than the smaller head or socket |
| Trial counterbore diameter | 20 mm gives the washer 1 mm clearance on each side |
| Combined head and washer height | 4 + 1.5 = 5.5 mm |
| Trial recess depth | 6 mm puts the top of the head 0.5 mm below the surface |
| Timber left in a 19 mm board | 19 − 6 = 13 mm |
These assumed dimensions demonstrate the checks; measure your own hardware and follow the joint design. The 0.5 mm space above the head is not a useful allowance for a normal timber plug
Use a suitable flat-bottom boring tool for the recess and a separately sized clearance or pilot hole for the fastener. A tapered countersink would leave this washer without the intended flat bearing surface
Worked example: a conical screw head
If the fastener specifies a 90° countersink, choose a 90° cutter. For an ideal cone opening from 4 mm to 8 mm diameter, the depth is (8 − 4) ÷ 2 = 2 mm
That geometry is a starting check, not a substitute for trial-fitting the actual head, which may include a rounded edge or a short neck
Calculate recess depth and remaining wood
A 19 mm board with a 6 mm deep flat-bottom recess leaves 13 mm of wood below the recess; in an imperial example, ¾ inch minus ¼ inch leaves ½ inch
That subtraction describes the geometry, not the strength of the fastening
Moving the head deeper also changes how far the screw reaches into the next piece; check the screw-length convention and assembled geometry before selecting the length
Drill and check a sample hole
- Use matching scrap
Choose the same material and thickness, plus the actual fastener and washer
- Set the depth
Clamp and support the work, then use the appropriate bit and controlled depth setting
- Trial-fit the hardware
Do not force a mismatched head into place; use a straightedge if the head should finish flush
- Inspect the edge
Check for chipped veneer and test any plug before repeating the setting across visible fixings
Fix proud heads, rocking washers and chipped edges
| Problem | Check |
|---|---|
| Head stands proud | Seat diameter, head angle, debris or an obstruction |
| Head sinks too far | Recess depth, driving control and crushed timber |
| Washer rocks | Flatness, debris or a tapered seat beneath it |
| Socket cannot reach | Recess width and the socket’s outside diameter |
| Timber splits | Pilot preparation, edge distance and the specified fastener |
| Veneer chips | Bit condition, support and drilling method |
Common countersink and counterbore questions
Can a large ordinary drill bit make a countersink?
Its point can cut a depression, but may not match the screw head; use a tool with the required seating geometry
Are all countersink angles the same?
No; match the fastener specification and the tool
Should every screw head be recessed?
No; brackets, washers and some decorative heads are designed to bear on the surface
For clean panel edges before assembly, see how to cut plywood without splintering