Double Trash Can Enclosure Plans
Garden storage · Digital building plans
Double trash can
enclosure plans
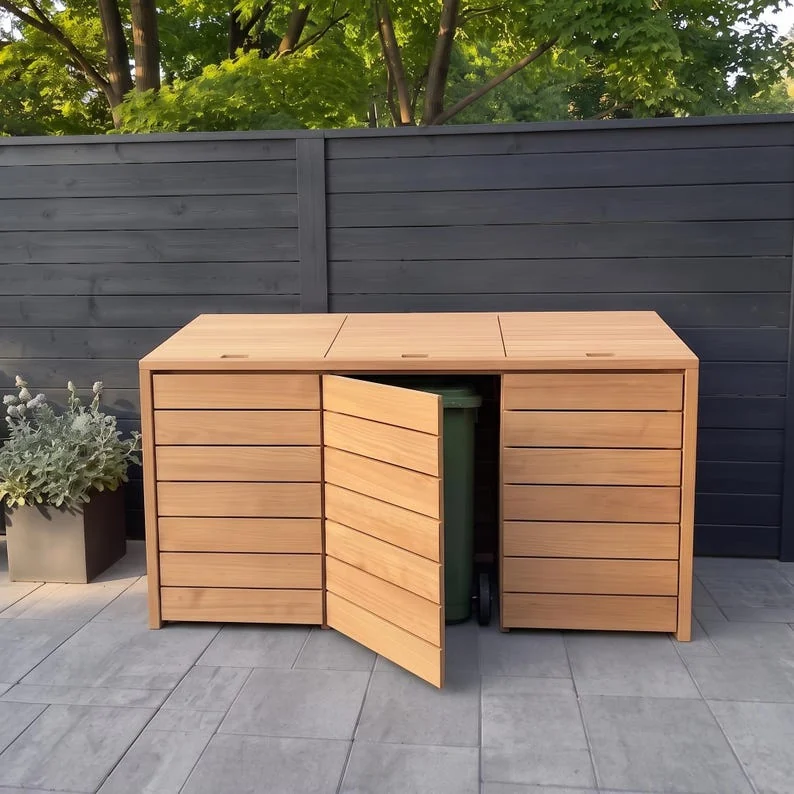
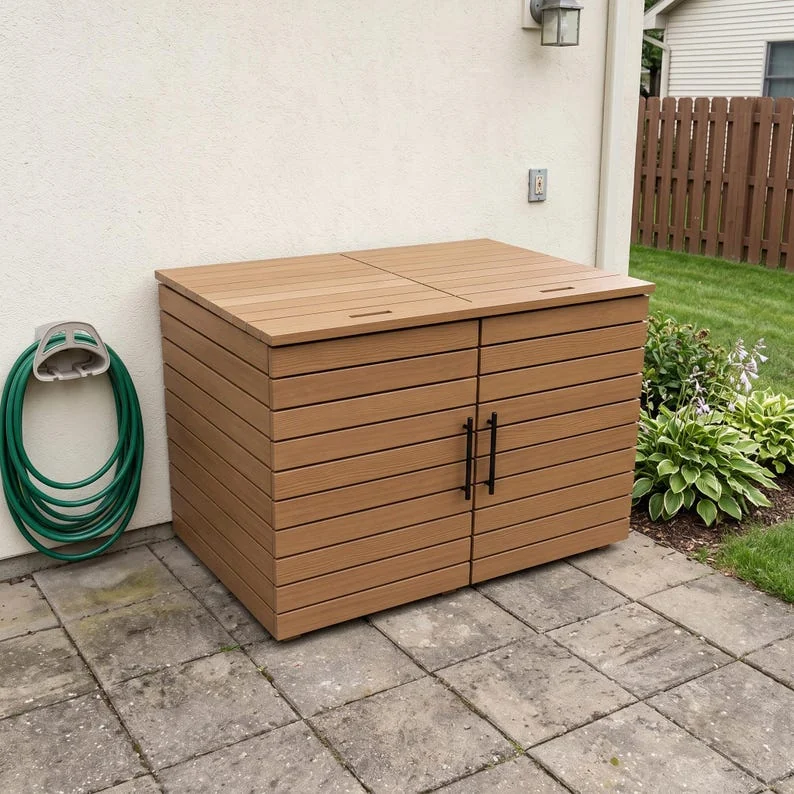
Build a wooden enclosure for two trash cans or wheelie bins, with front-opening doors and separate lift-up lids. These digital plans include 17 illustrated steps, cut lists, two PDF editions and a SketchUp model.
Roll your bins out from the front · Load bags from above
- Designed for
- Two trash cans / wheelie bins
- Build experience
- Confident DIYer
- Allow for the build
- Two weekends*
- Inside the download
- 17 steps + SketchUp model
Both PDF editions included · See current price on Etsy
Look inside the plans ↓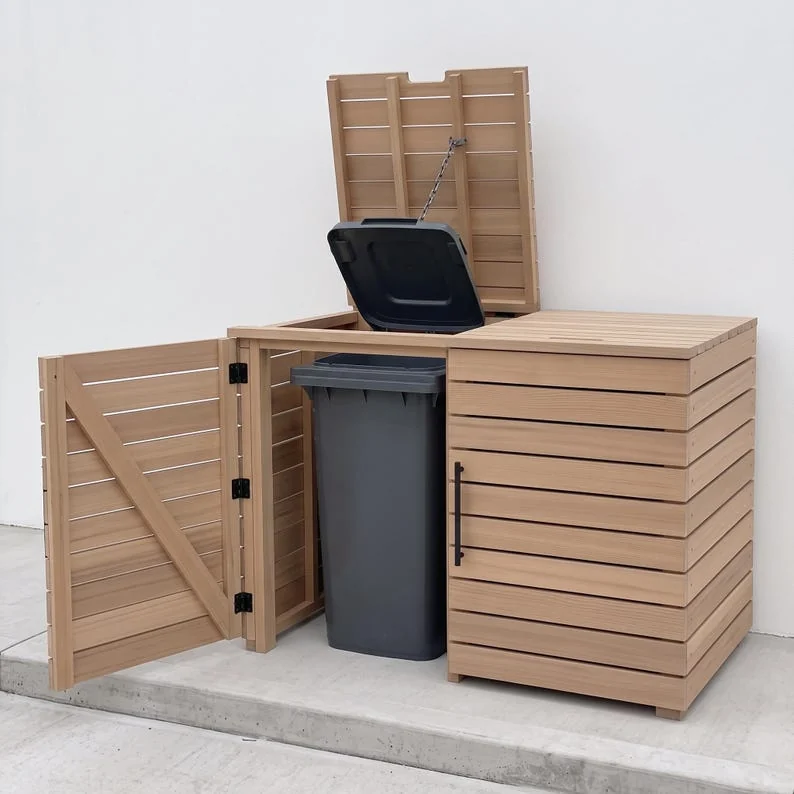
Made for the everyday
Hidden away
Easy to reach
A door for each bin
Open the front and wheel a bin out without lifting it over a built-in floor. Each bay has its own door.
Lift the lid, drop the bag
Separate timber lids give access from above. The plans include lifting chains that connect to compatible bin-lid handles.
A clean, slatted finish
Horizontal boards carry around the enclosure, with braced doors and flush-fitting lid panels. Build in cedar or larch.
Plan your space
Dimensions: will your bins fit?
Check the enclosure dimensions, then measure your bins with their lids closed. Include handles and wheels.
| Imperial inches | Metric centimetres | |
|---|---|---|
| Overall enclosure | ||
| Width | 77¼ | 200.5 |
| Depth | 51¼ | 131.4 |
| Height, lids closed | 55 | 140 |
| Clear space for each bin | ||
| Door opening width | 33½ | 85.5 |
| Opening height | 51¾ | 130.5 |
| Internal depth | 47½ | 120.4 |
Each uses its own timber sizes, so dimensions differ slightly. These are not direct conversions. Follow one edition throughout; metric plans use millimetres.
Measure the whole bin
Check its widest point, total depth and closed-lid height. Capacity in gallons or litres alone won’t confirm the fit.
Leave a little breathing room
Your bin needs clearance to roll through the opening. Don’t choose a bin that fits the listed space exactly.
Check the opening space
Allow room in front for doors and bin access, and above and behind for the lids to swing open.
Need a different size for your space?
Ask about custom plans ↗Plan your build
From frame to finished enclosure
Three main stages, broken into 17 illustrated steps in the full plans. Here’s how the project comes together.
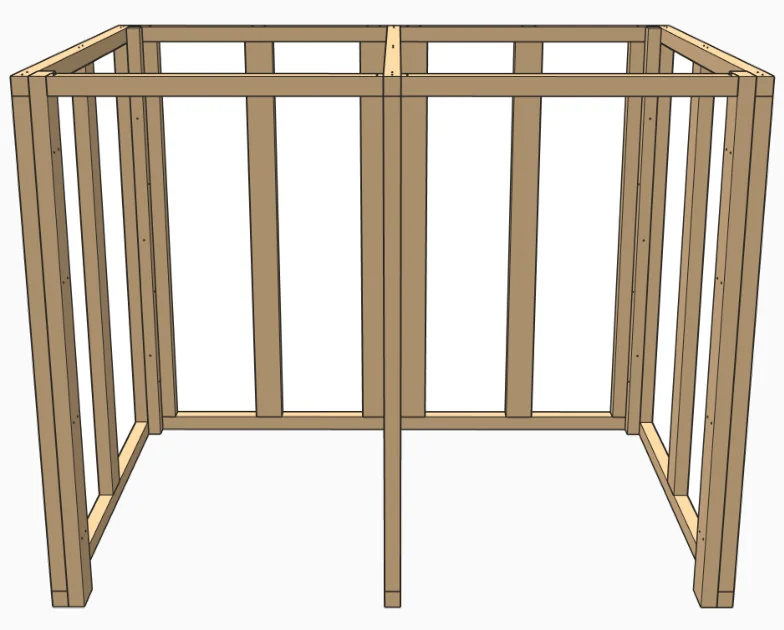
Build the frame
Assemble the two side-and-back sections, add the divider, then square the frame and fit the front rails.
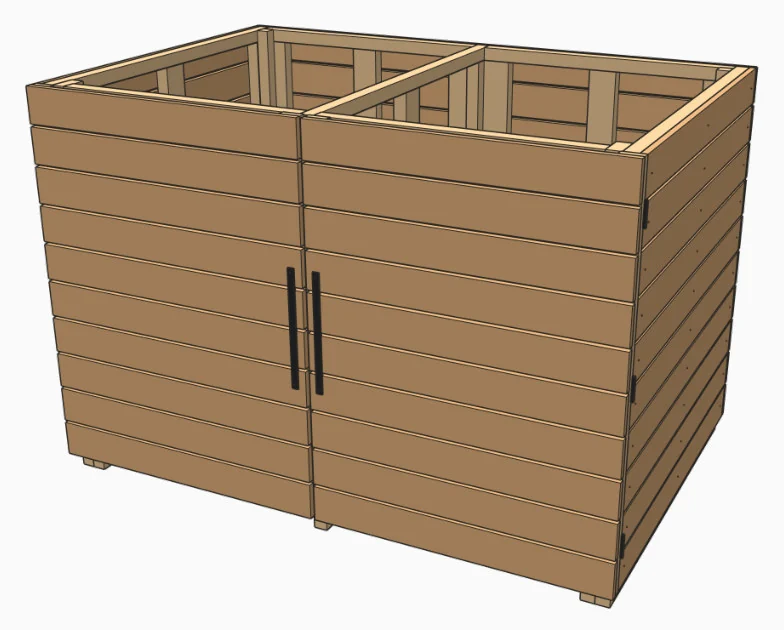
Clad it and hang the doors
Add the horizontal boards, build the braced doors and adjust the hinges and catches for an even fit.
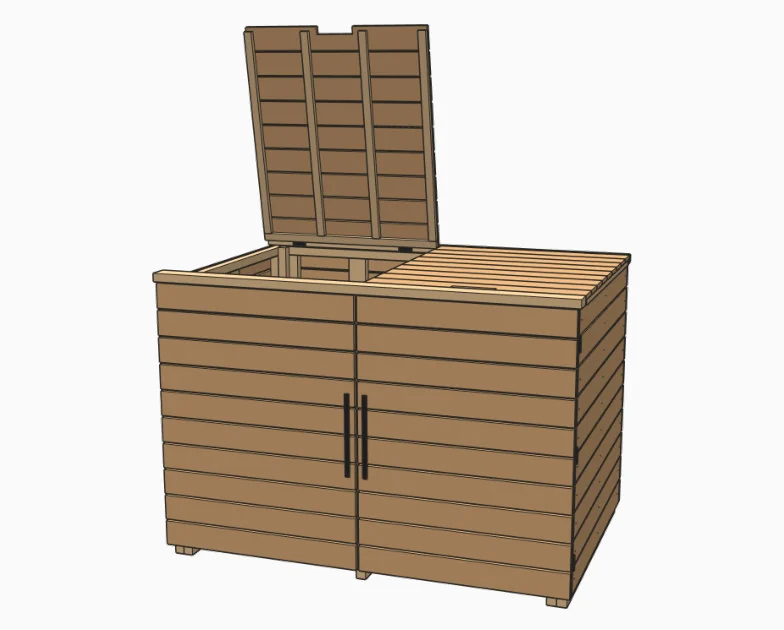
Add the lids and lifting chains
Build and hinge the lid panels, fit separate lid supports, then attach and test the bin-lid lifting chains.
Before you pick up a saw
This suits a confident second or third build. You’ll assemble square frames, brace and hang doors, and recess the lid hinges.
*The guide suggests two weekends. Allow extra time for preparation, your experience level and the finish’s drying instructions.
- Start with a level pad
Paving, concrete or stable compacted gravel. An uneven base can twist the frame and throw the doors out of alignment. - Have the tools ready
Mitre or circular saw, drill/driver, countersink bit, jigsaw, sharp chisel, tape, square and level. Clamps and a helper make assembly easier. - Choose exterior materials
Cedar or larch, exterior-rated fasteners, hinges, catches and suitable lid supports. The full plans specify the sizes and quantities. - Check the timber for your edition
The imperial plans use 1×6 boards ripped to 4¾ in wide, so you’ll need to cut the boards lengthwise to width. A table saw is helpful for this job. The metric plans use 20 × 120 mm cladding.
Look inside the plans
What’s included in the plans
Actual pages from the imperial PDF. Open a sample to read the instructions and see the drawing detail.
The complete build, in your hands
- 29-page imperial PDF
- 29-page metric PDF
- 17 illustrated assembly steps
- Timber shopping list + hardware schedule
- Full cut lists, linked to the build steps
- SketchUp 3D model
- Bin-lid chain instructions + care guidance
Purchase and download through Etsy
Timber, tools and hardware are purchased separately
A few practical details
Questions about these plans
Will my bins fit?
Compare the widest part of each bin, including wheels and handles, with the clear door opening, internal depth and opening height above. Measure with the bin lid closed and allow clearance to roll it in and out. Gallon or litre capacity alone is not a fit guarantee.
Does it keep the bins completely dry?
The enclosure has gaps between the boards and is not a watertight shed. Keep your bins’ own lids closed inside it.
Do the chains work with every bin?
The snap-hook connection needs a suitable opening in a solid part of the bin-lid handle. If your handle has no compatible opening, you’ll need a fitting designed for that bin. The lifting chain does not support the wooden lid; use separate suitable lid support hardware.
Is there a floor?
No built-in floor: the bins roll onto the existing pad. Choose a firm, level surface and check the door swing and access route before building.
Are the imperial and metric plans identical conversions?
They follow the same design but use different timber sections, so finished dimensions differ. Both PDFs are included. Pick one edition and use it consistently.
Do I need SketchUp to use the plans?
No. The PDFs contain the illustrated build instructions. The SketchUp model is an additional way to explore the design.
Am I buying the enclosure or the plans?
This is a digital download of building plans. You buy the timber, hardware and tools separately and build the enclosure yourself. The Etsy listing provides the current price and purchase details.
Ready to build your enclosure?
17 illustrated steps · Imperial + metric PDFs · SketchUp model
More for your outdoor space